A stacked pumpkin tower looks simple online: three pumpkins, biggest on the bottom, done. On a Front Range porch it rarely survives that way past the first windy afternoon. Round field pumpkins are close to spherical, they sit on a curved bottom that rocks on any step that isn't dead level, and a gust off the foothills catches a top-heavy pumpkin topiary sideways before you notice. Building stacked pumpkins for porch steps that hold into November takes flat-bottomed varieties, a hidden spine, and a weight order you plan before you touch a pumpkin.
- Round field pumpkins roll; flat-bottomed varieties like the Cinderella pumpkin and Jarrahdale carry a stack instead of rocking on it.
- A rebar or dowel spine through packed soil or gravel keeps every tier from sliding off the one below it.
- Each tier should run roughly 60 to 70 percent of the diameter of the tier under it, heaviest and widest at the base.
- Three tiers is the practical limit for a tiered pumpkin stack on a porch step; four needs a hard anchor into the ground.
- Cut stems and shaved flat spots are where rot starts first, so the top tier typically softens before the base does.
Why Most Stacked Pumpkins for Porch Towers Fail
Most stacked pumpkin displays fail because they rely on friction alone, and friction between two round surfaces is not much to build on. A field pumpkin is nearly spherical, so it wants to roll the moment it's tilted off center. The stem sticking up from the last pumpkin acts as a pivot point for the one balanced on top of it, and any lean gets worse instead of correcting itself.
Add wind stability into the mix and the problem compounds. A stack with all its weight up high catches a gust the way a sail does, and Front Range downslope wind doesn't need much of a lever arm to tip something over. Nothing about a round pumpkin holds a tower up by itself. The shape and the spine underneath it have to do that work.
Varieties That Carry Load
The Cinderella pumpkin, also sold as Rouge Vif d'Etampes, is flat and deeply lobed with a burnt orange skin, and it sits like a plate rather than a ball. That flat profile is exactly what a base tier needs. Jarrahdale is blue gray, heavily ribbed, and has the hardest skin of the common stacking varieties, which is why it's usually the longest-lasting pumpkin in a display and worth putting at the bottom. White Ghost, also called Lumina, works well mid-stack for contrast against the orange and blue gray tones. Knucklehead adds texture but its warts create an uneven bearing surface, so it's a poor choice for any tier that has to hold weight above it. Our pumpkin varieties guide has photos of each of these side by side if you want to match shapes before you buy.
Weight Order for a Stable Tiered Pumpkin Stack
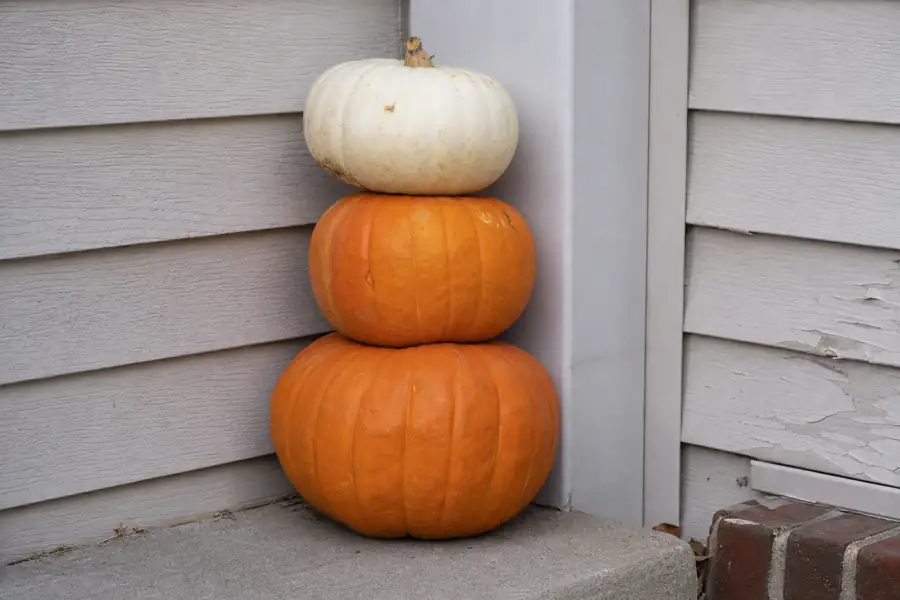
The heaviest, widest pumpkin always goes on the bottom, and each tier above it should run about 60 to 70 percent of the diameter of the one below. A base pumpkin around 16 to 18 inches across carries a mid-tier around 10 to 12 inches, topped with a mini in the 5 to 6 inch range. Skip that ratio and go too close in size between tiers and the stack reads as top-heavy even before wind gets involved.
Three tiers is the practical limit for anything sitting loose on a porch step. A fourth tier is possible but it needs a hard anchor into the ground rather than a planter, because the taller the stack, the more leverage wind gets on the base.
The Rebar Spine
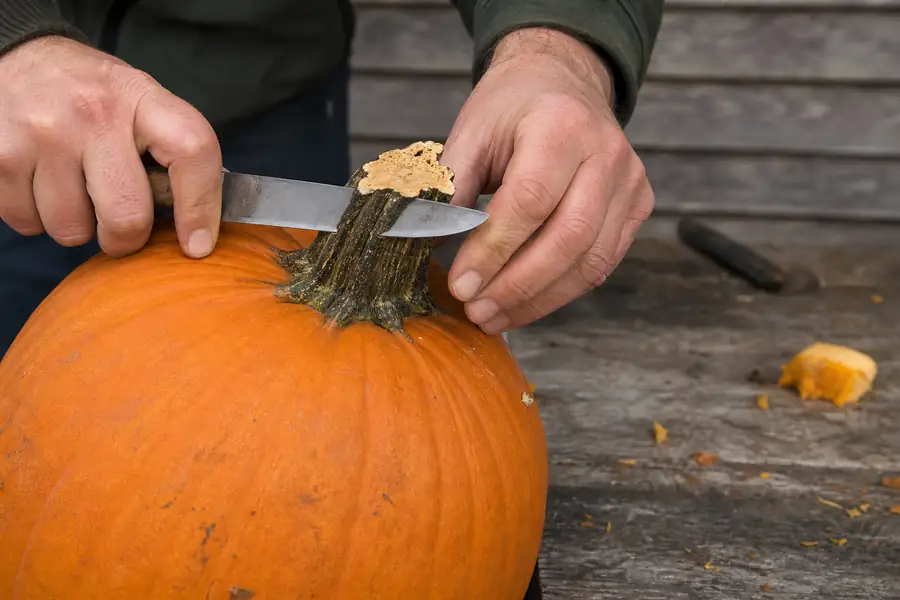
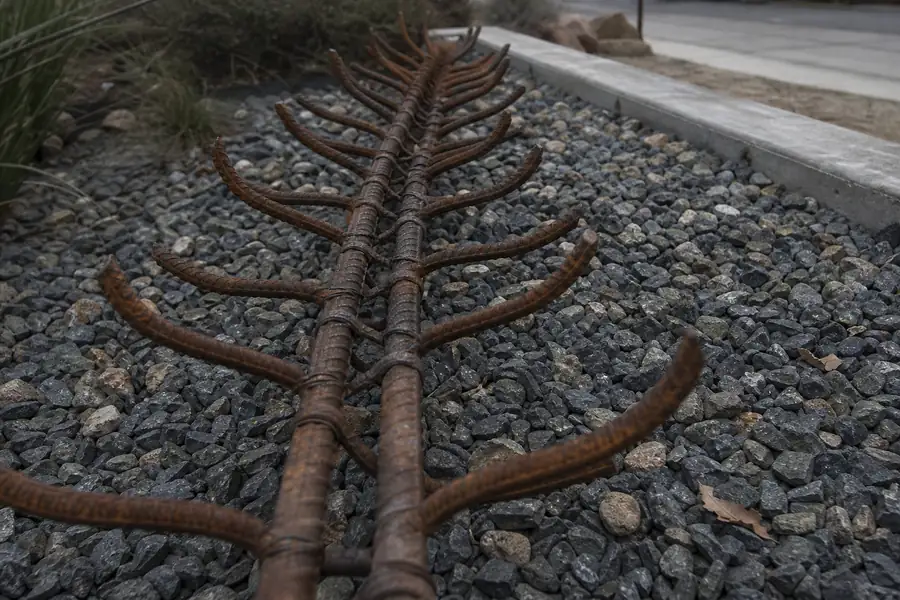
A rebar spine, a length of steel rebar or a thick wooden dowel driven down into a planter of packed soil or a bucket filled with gravel, is what actually holds a stacked pumpkin tower together. Cut each pumpkin's stem flush with the shoulder before pushing it down onto the spine, then thread the next pumpkin over the same rod. A flush stem is what lets the next tier sit level instead of perched on a knob that tips it off center.
That cut is a tradeoff worth knowing about. A cut stem opens the pumpkin's interior to air, and that's where rot typically starts first, so the tier with the cut stem usually softens before an unstacked pumpkin of the same variety would.
Seat Every Layer
Shave a flat landing into the top of each pumpkin before you set the next one on it, or use a rubber furniture pad between tiers if you don't want to cut into the shell. Either method gives the tier above something level to sit on instead of a curved surface that invites rocking. Trim the stem down, but don't cut away the whole shoulder. You want a flat spot to build on, not a bowl.
Wind and Weather for a Stacked Pumpkin Display
Stacked pumpkins for porch steps hold up better through a Colorado fall when the base is anchored and the display is kept out of standing water. Displays get seated and staked for Front Range wind for a reason, and the same logic that keeps a flat arrangement from sliding is what keeps a tower from tipping. Our guide to keeping a porch display standing in Front Range wind covers anchoring in more detail.
Keep the stack away from sprinkler spray and pooled water on the step, since a soft base shortens the whole tower's life. A stack against a west-facing wall in towns like Boulder or Louisville also takes stronger afternoon sun, and that heat cracks skins faster than a shaded porch does. Expect cut surfaces to soften first no matter where the stack sits. For a sense of the general timeline, see how long pumpkins typically last outside in this climate.
The Build
Materials: three flat-bottomed pumpkins in descending size, a 3-foot rebar stake or a 1-inch wooden dowel, a planter or 5-gallon bucket, packed soil or pea gravel, a sharp utility knife, rubber furniture pads (optional), and a level. Plan on 30 to 45 minutes for three tiers.
- Fill the planter or bucket with soil or gravel and pack it firm.
- Drive the rebar or dowel straight down into the center, leaving enough exposed to run through all three pumpkins.
- Cut the stem off your base pumpkin flush with the shoulder.
- Lower the base pumpkin over the spine and check it's level.
- Shave a flat landing on top of the base pumpkin, or set a rubber pad there.
- Cut the stem flush on your mid-tier pumpkin and lower it over the spine onto the landing.
- Check level again before adding the top tier; adjust the landing if it rocks.
- Cut the stem on the mini pumpkin and set it on the final landing.
- Step back and check the stack from the side for lean before you call it finished.
If you'd rather skip the cutting and the rebar entirely, our Enchantment package comes with pumpkins already sized for stacking, delivered and set on your step by us.
FAQs
How do you stack pumpkins so they do not fall?
Run a rebar or wooden dowel spine down through the middle of a planter or bucket of packed soil or gravel, then thread each pumpkin over it after cutting the stem flush. The spine, not friction between the pumpkins, is what keeps a tiered stack from sliding or tipping in wind.
What pumpkins stack best?
Flat-bottomed varieties carry a stack best. The Cinderella pumpkin and Jarrahdale both have a wide, flat base and heavy skin, which makes them good choices for the bottom and middle tiers, while a mini pumpkin works fine on top where weight matters less.
Do you need rebar for a pumpkin tower?
You need some kind of rigid spine for anything beyond a single flat-bottomed pumpkin resting alone. Rebar or a thick wooden dowel through packed soil or gravel is the most reliable option, though a smooth wooden stake works for a lighter two-tier stack.
How long does a stacked display last?
A stacked pumpkin tower typically holds its shape for several weeks into October, with the top tier softening first because its stem gets cut. Cool, dry weather stretches that out, while standing water, sprinkler spray, or a hot west-facing wall shortens it.
Can you stack carved pumpkins?
Carved pumpkins are a poor choice for stacking because an open cavity has no structural strength and collapses under any weight from above within a day or two. Save carved pumpkins for a flat surface on their own and keep stacking for whole, uncarved pumpkins.